You have a nice new corporate design, but how do you implement it as a theme across all Microsoft Office files in your organisation? This blog and video will demonstrate how to quickly set up Word, PowerPoint and other Microsoft applications with your design. You will need to know your corporate colours in RGB or hexadecimal values.
Theme vs Template
A theme applies a combination of fonts and colours across the Microsoft Office suite of applications. This differs to ‘templates’ which are specific to each application and can incorporate a specific theme. A template will include other formatting features such as logos, borders, margins and line spacing.
Creating Your Theme
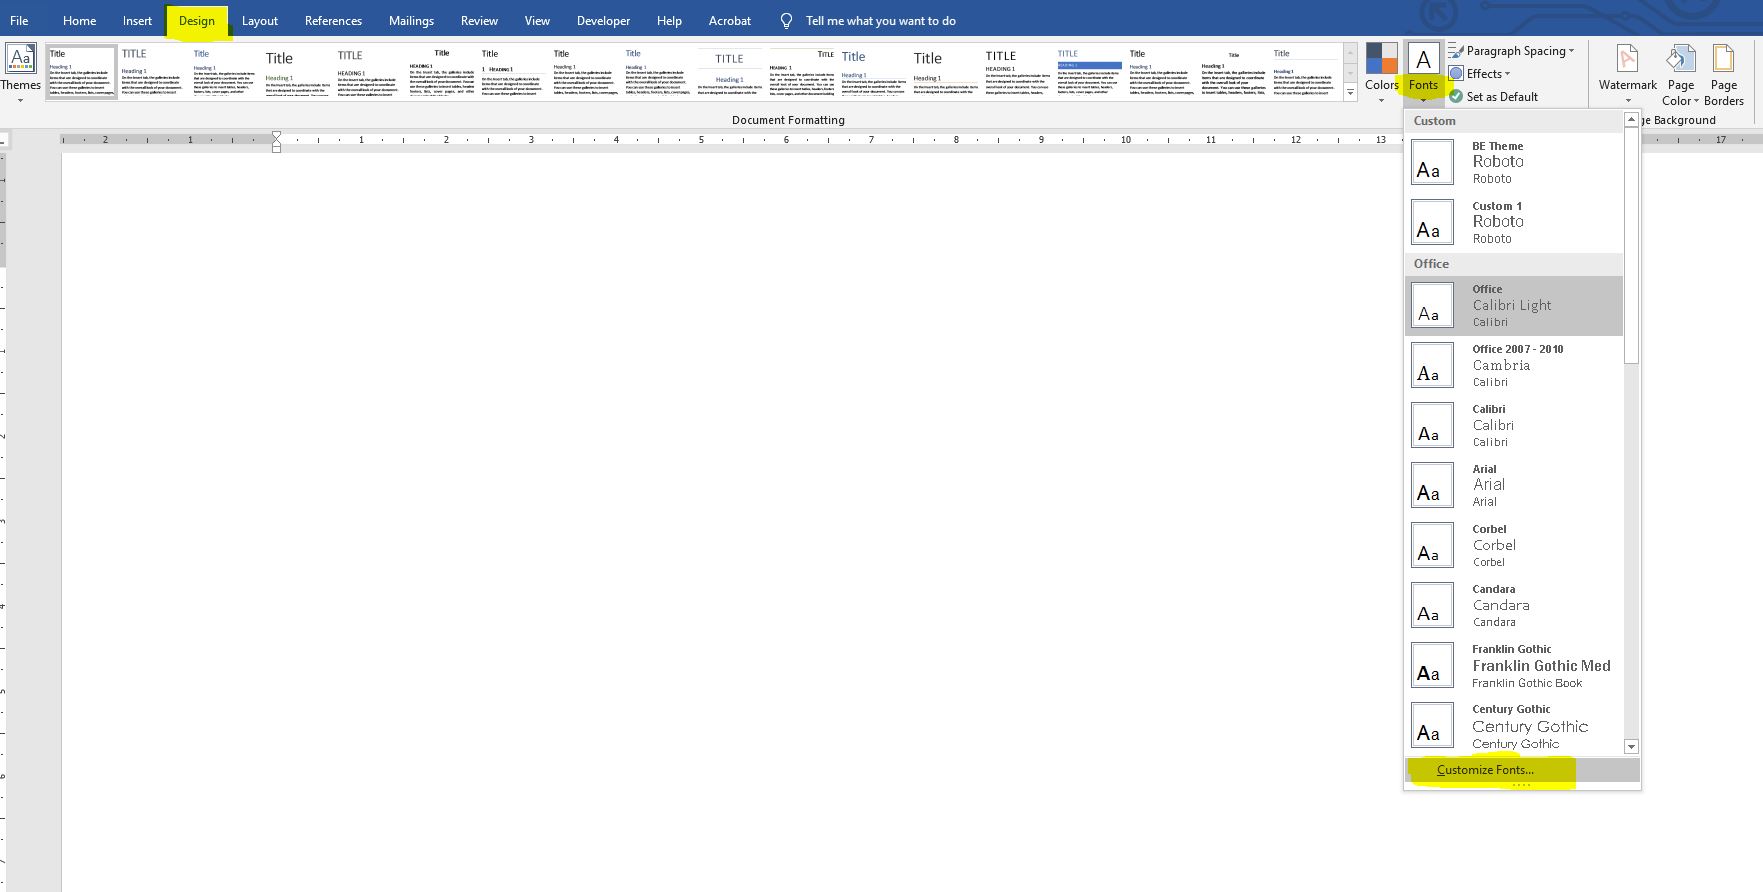
The first step is to create and save the theme to reflect your corporate colours and fonts. Open a new Office file – it doesn’t matter which application – we’re using Word here. Click the design tab on the ribbon here, then click “fonts” and “customise fonts”.
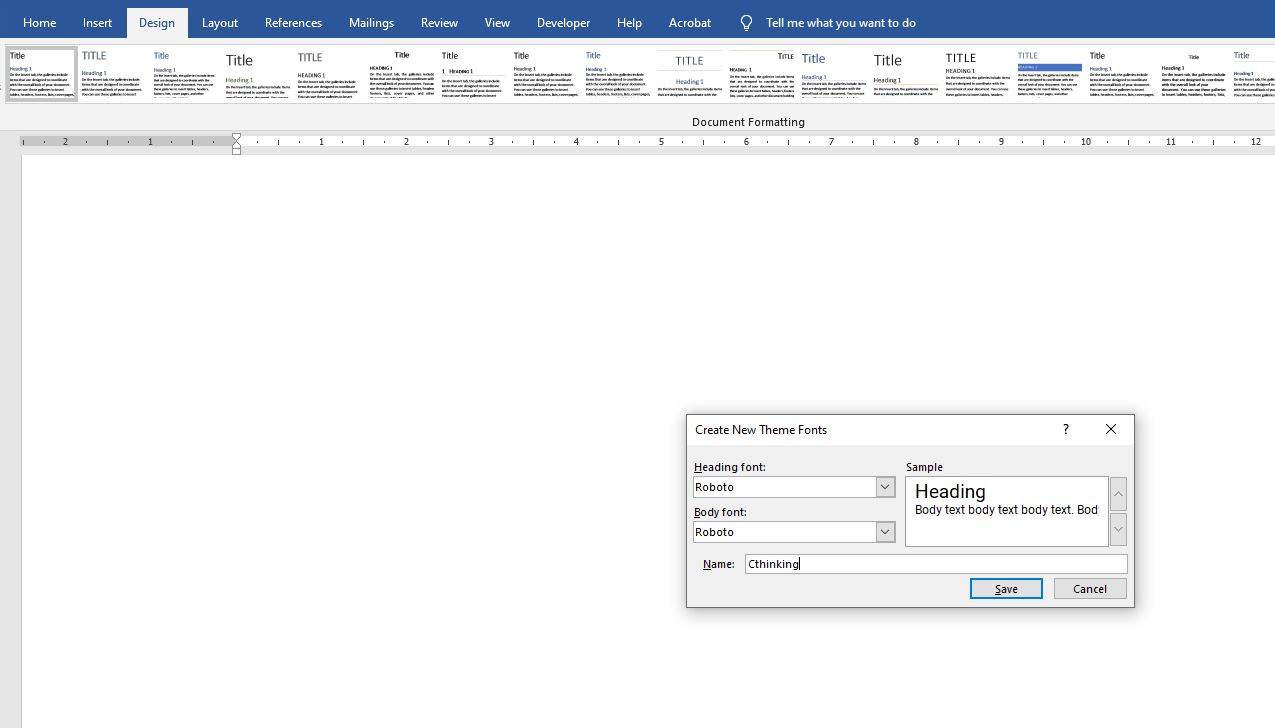
You have the option to specify a heading font and a normal body text font – they can be the same. Choose them from the drop down list. If you’re using a non-standard font, you’ll need to have installed it first, then restart Office and it should appear in the list. Give your font set a name here and close.
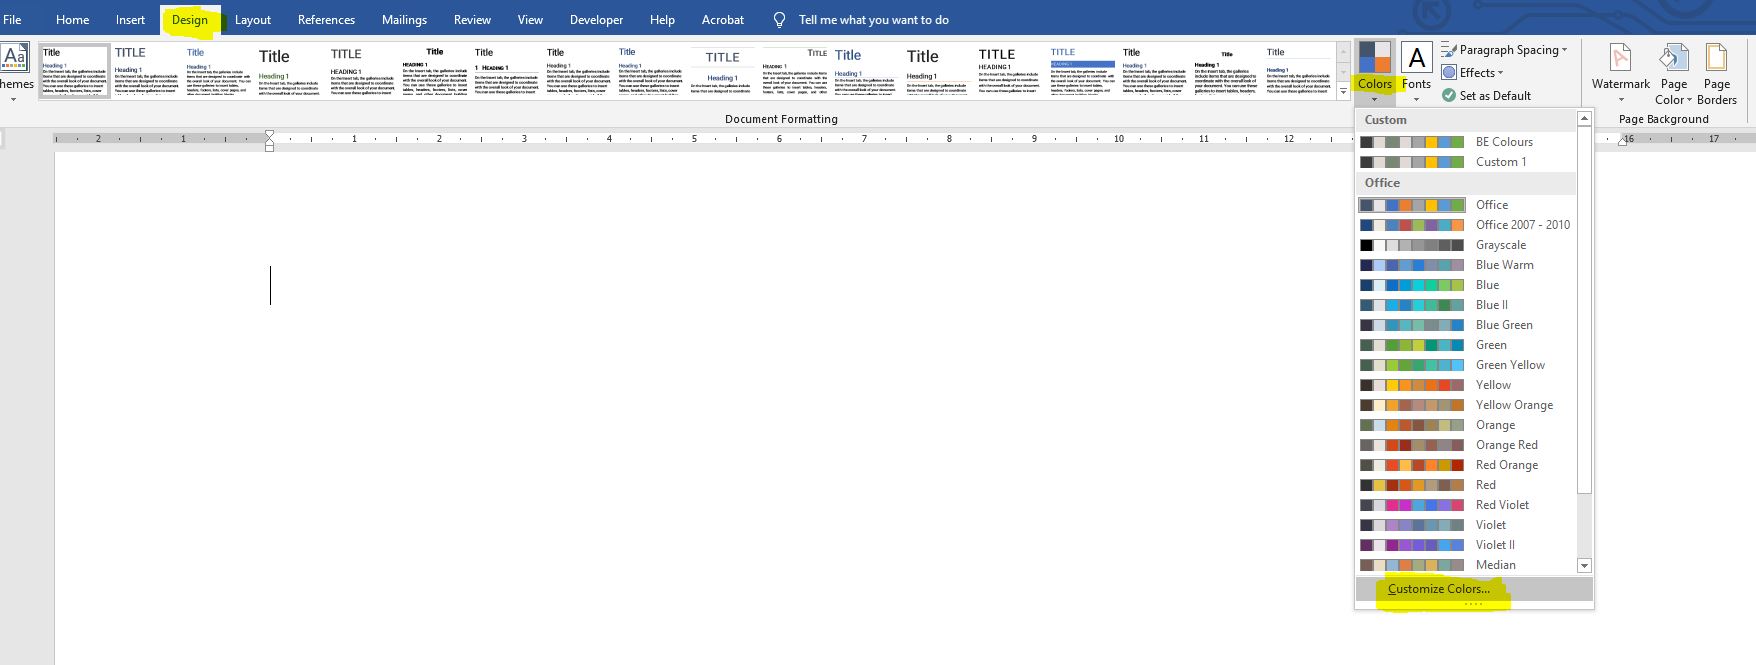
Next choose ‘colors’, and ‘customize colors’.
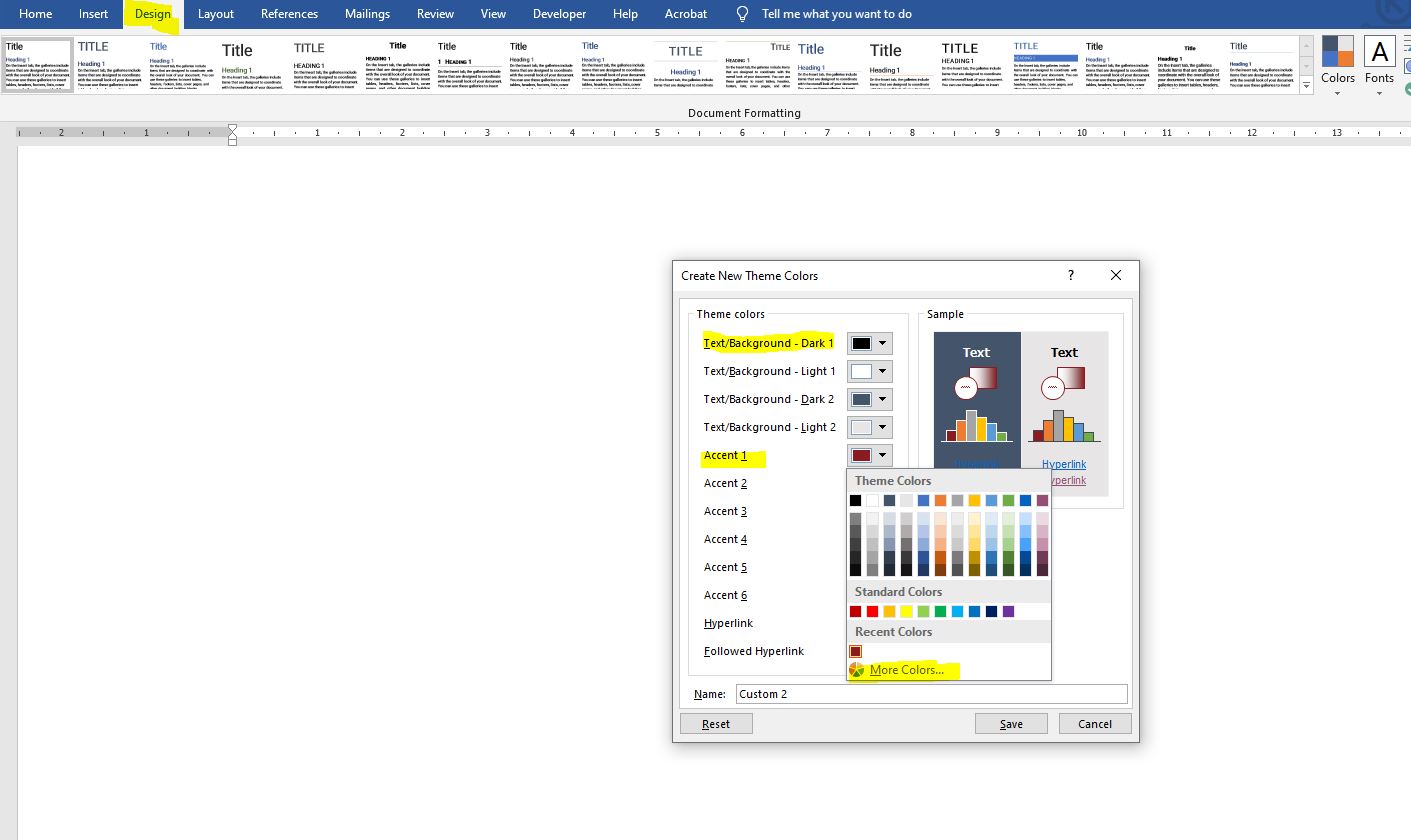
It’s important to get a few basics right. You’ll need your main dark text colour here. Often this will be black or dark grey. From a design point of view the most important colour is ‘Accent 1’: this is the colour Microsoft applies to headings. It makes sense to make Accent 1 your main corporate colour.
To make changes, click on ‘more colours’ and enter the RGB or hexadecimal values, then ‘OK’ and ‘save’. I recommend not changing the two hyperlink colours as these are widely accepted.
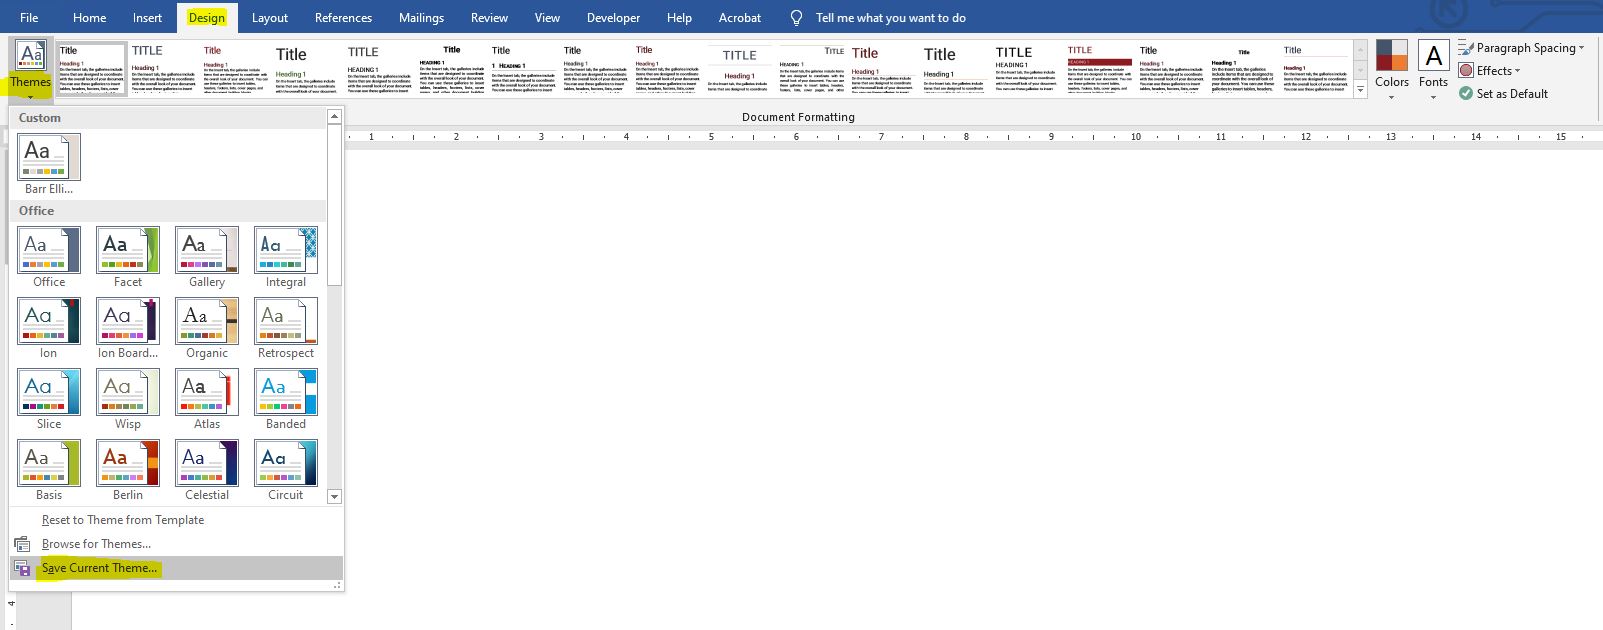
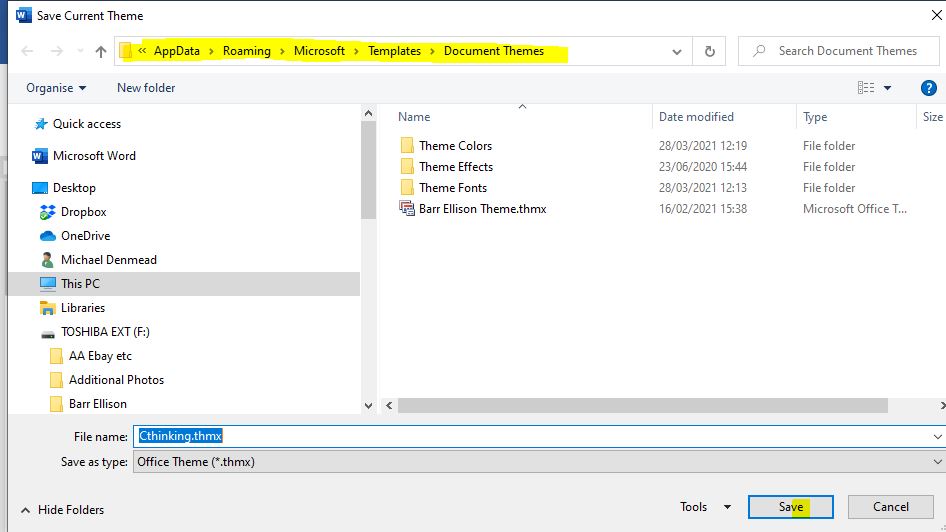
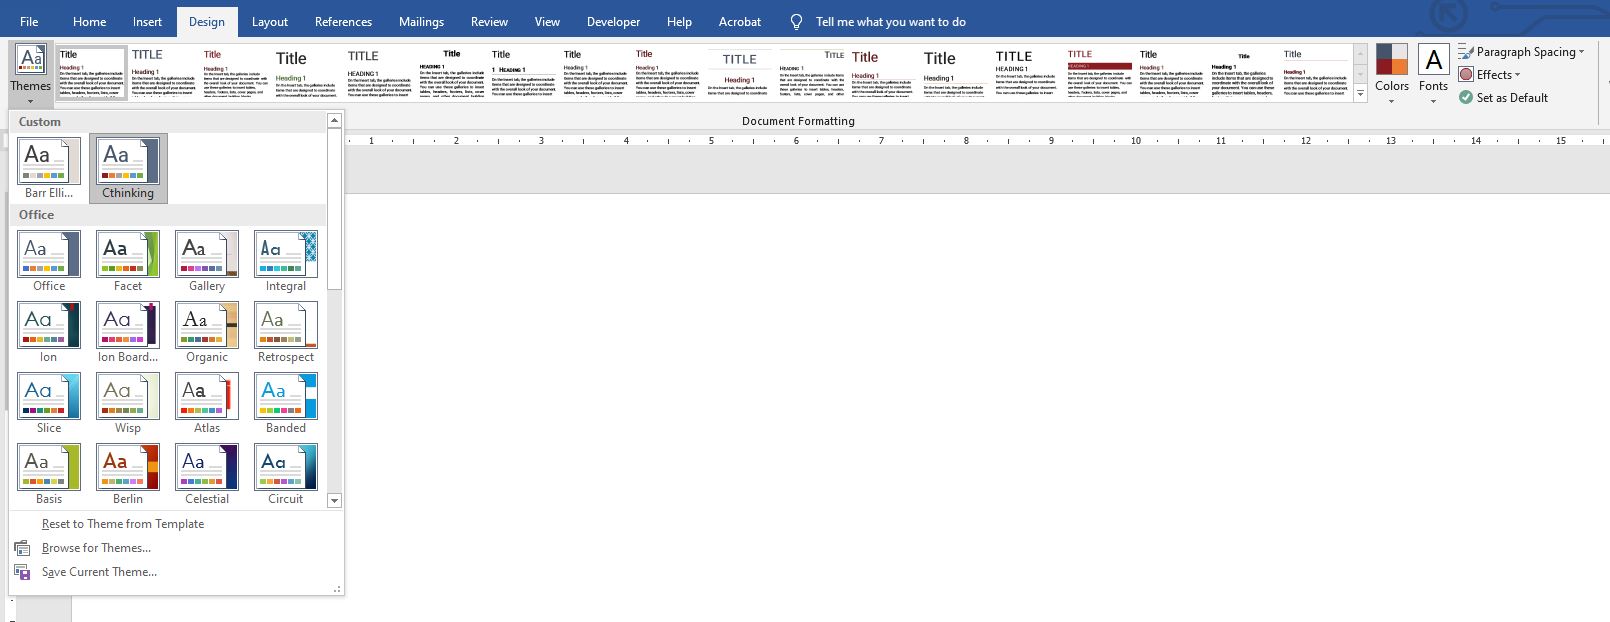
Once you have changed your fonts and colours, you save these to a theme by clicking Design, then Themes and giving your theme a name.
Note where the theme is saved so you can send it to others.
Template documents which are based on your theme will include the colours and fonts, but you will also want to also adjust other aspects of a template to reflect your corporate visual identity. For example, you can add a logo to the header or footer.
Retrieving Your Theme
Finally, to retrieve a theme and apply it to your document, go to Design, then Themes and select the Theme you wish to apply.
The blog was also created in video form:

